Wednesday, December 24, 2008
Total Slacker
I know I am a total slacker ladies.. but i only have 10 days to go until I am a Mrs and things are crazy!! I will definitely be posting pics and reviews and hopefully being WAY more active in my blogging! Thanks for being such supporters!!
Thursday, November 20, 2008
I know I know
It seems that the closer and closer i get to the wedding the less and less time i have on my hands,... now why is that? So last not Nick and I went in search of our groomsmen attire.. yes that is right.. we are six weeks away from our wedding and still do not have our grooms men attire. We wandered around the mall to this store called Havanna where we were told they sold the Guayabera shirts.. Well, they do. For $600! I walked in the store and walked back out. See I am what they call.. Cheap. I think paying $600 for a shrit is ridiculous. Now granted I paid 650 for my dress, but I got a complete outfit out of it.. There is no more shopping to be done with that outfit. But none the less we found a great alternative at Macy's on sale. But we had some concerns in regards to sizes for our men. So, I believe we will be purchasing these shirts from Blair.

Wednesday, November 5, 2008
:FREE WEDDING GOWNS FOR MILITARY BRIDES IN FORT LAUDERDALE
FREE WEDDING GOWNS FOR MILITARY BRIDES IN FORT LAUDERDALE
Nov. 11 - Fittingly, on Veterans Day, bridal salon Patricia South's The Bride's Choice will give 10 designer bridal gowns away on a first-come, first-serve basis to military brides-to-be. Doors open at 11 a.m. (and close at 8 p.m.). The salon is at 4066 West Broward Blvd.To qualify, brides must be engaged, be on active duty in the military or have a fiance on active duty in either Iraq or Afghanistan. All military brides must show military ID, copy of deployment papers, copy of military orders or other qualifying proof. Brides do not have to reside in the area. Call ahead for an appointment at (954) 791-6007. For more information, go to abrideschoice.com. For other participating stores and states, go to bridesacrossamerica.com
Nov. 11 - Fittingly, on Veterans Day, bridal salon Patricia South's The Bride's Choice will give 10 designer bridal gowns away on a first-come, first-serve basis to military brides-to-be. Doors open at 11 a.m. (and close at 8 p.m.). The salon is at 4066 West Broward Blvd.To qualify, brides must be engaged, be on active duty in the military or have a fiance on active duty in either Iraq or Afghanistan. All military brides must show military ID, copy of deployment papers, copy of military orders or other qualifying proof. Brides do not have to reside in the area. Call ahead for an appointment at (954) 791-6007. For more information, go to abrideschoice.com. For other participating stores and states, go to bridesacrossamerica.com
Yes We Can!
Disclaimer: I know that some people may not agree with my political views, and I am sorry. But here it is:
So last night was one of the most historic moments in our nations history and I for one am SO VERY proud of Americans and their ability to overcome the hystera of diversity and to see a need for a change in our country. Last night this country did not see black and white, they saw two candidates who were running for political office and we made a decision. We made a decision for change, and I for one am in aw at the process and with everyone who got out there and voted. Regardless of your beliefs and who you voted for, we got out there and voted in force! Many historical records were broken yesterday!
Yes, I am a Barack Obama supporter so I am extrememly excited to see my candidate as the President Elect. And I for oneam filled with such a profound feeling of Hope with Barack Obama making his way to the Presidency. I truly hope that he is able to not only live up to the hype, but also to stay true to the American People. We have put an amazing amount of trust in his hands and we can only wait and see what is to come. So, I leave you with his acceptance speech.
On a side note I am DEEPLY saddened to see Amendment 2 pass in Florida. I for one think it is a tragedy to take such rights away from ALL people regardless of what we personally want for ourselves. Unfortunately, many individuals only saw this initiative as banning gay marriages but they did NOT see it as affecting those of us who are domestic partnerships. I as an individual for the past 6 years have had NO legal rights should something happen to Nick. I have no visitation rights, no legal recourse, no rights should he pass to my very own home that I have paid on and lived in for 6 years!! I also feel for the elderly couples who do not marry because of economic and financial reasons. This too will affect them...
Tuesday, November 4, 2008
Live Update Widget
Alright guys, I thought I would add this to my blog since I am watching this closely today despite being at work and in school all day. I made it to the polls early this am and ast my ballot. I felt very knowledgeable about the different ammendments they were trying to pass and people in line even asked to read my normal English explanations of each ammendment. Don't forget to go vote today! Polls are open until 7 pm!!
Monday, November 3, 2008
Free Starbucks Coffee for Voting!!
GET OUT AND VOTE!! Thats right! It's that time of year to vote. It is our American duty to vote! Why would you let your chance to be heard go unheard? Thank you to Jamie for posting this! Starbucks has a new ad and they are giving away cups of coffee tomorrow, just for voting! for free! Isn't it worth the 5$ cup of coffee?
Sunday, November 2, 2008
Crazy Week
So it has been a bit of a crazy week for me. I had another exam in Anthropology on Tuesday.. Wednesday I relaxed, Thursday Dress Fitting (BLAH!), Friday HAlloween at work, then trick or treating with the kids, then Saturday was Softball and Soccer for my neice and nephew and then last night was a Halloween party for us adults. So take a deeeeeep breath.. and lets begin..
The Fitting went pretty well.. I really love Maria over at Mariolka;s she is such a delight to work with. We pinned up my bustle and I will go back the first week in december for another fitting.. We are not going to make any adjustments jsut yet since I have been in the gym at least 4 days a week..
On Friday we had a Halloween party at work. Idecided to wear my Amy Winehouse costume and had everyone cracking up. A coworker of mine made a squirrel costume and looked adorable! Unfortunately, on my way to leave my friend Stephanie was there with her baby and of course I wanted to hold him.. Well, that is until he puked all over me. so... I had to run home and think of a costume super fast for trick or treating.. So.. I'm a bride to be, I have veils, I own white dress, I'll be a pregnant bride.. and a cute one I must add... It was hysterical.. the kids kept punching my belly and of course.. I love to shock people so I would yell OW! My BABY! .. I know.. Im a sick individual... Softball was fun.. It really made me remember all the years I spent playing softball, so I got my glove from home and threw around a few balls with Shy shy in the backyard.. She was very excited about it. The Halloween party was great! There was a couple dressed up as a Cop and a donut, Vikings(my sister and brother in law), Hippies (my other sister and brother in law), Arabian prince and princess, Spartan and his wife, Gangster, and me.. Amy Winehouse.. needle in my arm and all lol.. I won first place YAY!! I will post pics as soon as I have them!
Btw... The RSVPs have been rolling in slowly but surely... I am very excited!!! two months come Monday!!! and I still have LOTS to do. My ring, rent chairs, finalize food with caterer, mens outfits (which we are going to look at today) We will get there though! Have a Great Sunday! -
Monday, October 27, 2008
DIY Derringer Hat Tutorial
DIY Derringer Hat Tutorial
Alright Ladies.. So you have asked me to post directions as many of you would like to have a Mad Hatter themed party as well, pr you just want one of these cute hats. Please keep in mind that you can make this as big or small as you like… these are just the basic steps and you can modify them as you like. Also.. When I first started I used craft glue, then I also tried Hot Glue, and I used a tape runner believe it or not at some points.. Whichever you find will work best for you.. I definitely recommend starting with the craft glue. Also, keep in mind that when you choose your fabric you don’t want to use something TOO thick or too thin. If it is too thick you will have trouble getting it to stay and you will have to do a lot more stitching to keep things in place. If it is too thin the glue will show through the fabric.. For example thin muslin will not really work for this project. Please also post pics of your trials and errors, I would love to see yoru results as well!!
Supplies Needed:
Straight Pins,
Needle and thread in a coordinating color to your fabric
Hot Glue (Craft glue also.. you will see me use the hot glue gun in th epics)
About ¼- ½ a yard of fabric you would like to use
1 square of soft felt
1 square of stiff felt.. If you can not find stiff felt, Use two pieces of soft felt and craft glue them together.. or try craft foam paper..
Decorative pieces such a wreath picks, feathers, fake fruit piecesm beading, netting
Hair Comb or two (My original hat is taller then those in the tutorial so I needed two hair combs)
Scissors
Something to use as a stencil for the top piece of your hat, and the bas of the hat.
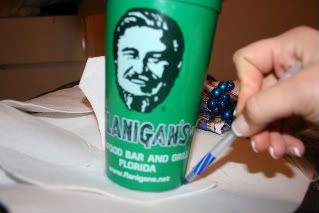 1. Using the stiff felt, I used the bottom of a cup to trace the top flat panel of the hat. Once you are done tracing this piece, Cut it out.
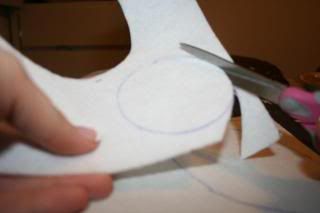
 2. Using the stiff felt again, I used the bottom of a hat I already had made to trace the bottom base of the hat. When I first started I used a CD and then sketched it slightly bigger then the cd.. you can also use an upside down bowl. Once you are done tracing.. cut out the circle..
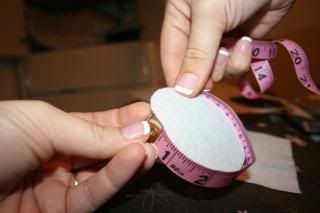 3. Using a tape measure, measure the circumference of the top of the hat. This is the length of the side panel you will need to make. I also wrapped a piece of felt around the hat to double check the length.
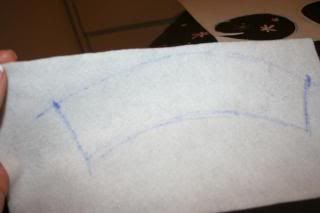 4. Once you have the length, sketch an arch on your soft felt in the same length as the circumference. The steeper the arch, the more of an angle you will form with your top hat. The straighter the line, the more of a perpendicular hat you will have (Similar to a traditional top hat.. I wanted an arch to give it that odd affect of the top of the hat getting bigger).
5. Decide how tall you would like your hat and sketch a similar arch at that distance below your first arch. Once you are done, cut this piece out.
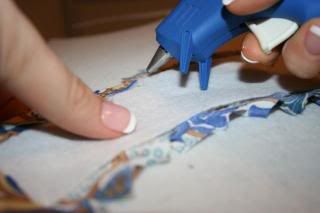
 6. We are now going to cover each piece with your selected fabric. With the top portion of your hat, measure out a piece of fabric just slightly larger than the top of the hat. Using glue, (whichever you chose to use) Glue the hat top onto the piece of fabric.
7. Using a pair of scissors, you will need to cut slits in the pieces of fabric that are hanging over the hat top… This will allow you to glue the pieces down evenly.
 8. Using your glue, glue the pieces of cut fabric to the under side of your hat top until they are all attached.
 9. You will need to repeat this step with the piece of soft felt that will make the side wall of the hat.
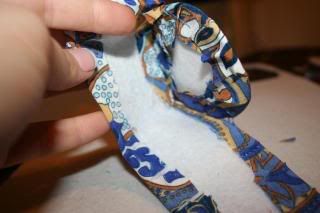
10. Cut a piece of fabric just slightly larger than the side hat piece of soft felt. You need to glue this piece down as well, and then cut the side edges in order to fold them over.
 11. Glue down the cut pieces onto the opposite side of the soft felt
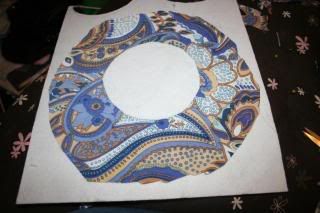 12. The base of the hat is the hardest piece since both sides of the base will be seen. You will need to cut a piece of fabric large enough to cover the hat completely by placing the stiff felt in the center and pulling up all of the sides to the center. You will need to glue this piece down in the center.
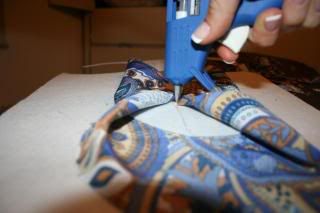 13. I use a little glue to hold down the main pieces of fabric down to the opposite side of the hat. I put the gleu in a cross pattern and pull up one of each of the four sides
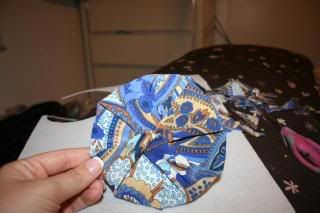 14. Using a needle and thread.. Pull the corners up to the center of the hat and sew down in a pattern or style you like.. I try to fold mine to make it nice and neat.. remember that the center where everything comes together will be covered by the top of the hat so it is ok if it looks a little rough.
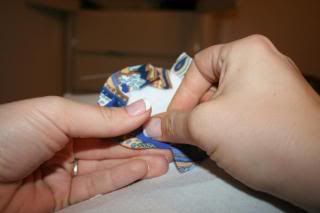
 15. Using straight pins, fast the top flat piece of the hat to the side wall of the hat.
 16. Then, use a needle and thread to attach them together.
 17. Once you have completed attaching the top to the side wall, stitch down the side of the side wall bringint to the two ends of the sidewall together.
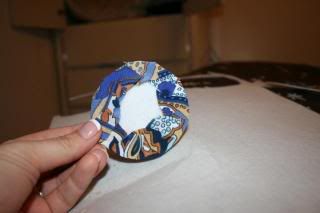
 18. Fill the top of the hat with any extra fabric you may have. This will help to keep the hat standing straight.
19. Using straight pins, fasten the top of the hat to the base where you would like to have it..
20. Using a needles and thread, attach the top of the hat to the base of the hat.
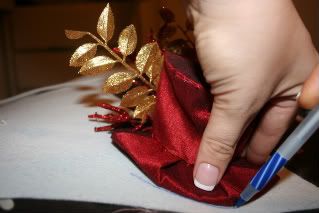
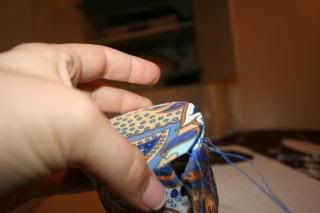
 21. Once this is complete, you can decide where you would like to add your decorative pieces. I usually use a needle and thread as well as hot glue(hot glue really helped me a lot when it came to the different picks.. Also, I found that if you are using picks that have a wire inside them, you can usually bend them slightly and slide the bottom of the wire under that hat to hide the excess.
22. Once you have completed attaching your pieces, you can sew a hair comb or two to the bottom of your hat.
Enjoy ladies! If you have any questions please feel free to let me know!
Alright Ladies.. So you have asked me to post directions as many of you would like to have a Mad Hatter themed party as well, pr you just want one of these cute hats. Please keep in mind that you can make this as big or small as you like… these are just the basic steps and you can modify them as you like. Also.. When I first started I used craft glue, then I also tried Hot Glue, and I used a tape runner believe it or not at some points.. Whichever you find will work best for you.. I definitely recommend starting with the craft glue. Also, keep in mind that when you choose your fabric you don’t want to use something TOO thick or too thin. If it is too thick you will have trouble getting it to stay and you will have to do a lot more stitching to keep things in place. If it is too thin the glue will show through the fabric.. For example thin muslin will not really work for this project. Please also post pics of your trials and errors, I would love to see yoru results as well!!
Supplies Needed:
Straight Pins,
Needle and thread in a coordinating color to your fabric
Hot Glue (Craft glue also.. you will see me use the hot glue gun in th epics)
About ¼- ½ a yard of fabric you would like to use
1 square of soft felt
1 square of stiff felt.. If you can not find stiff felt, Use two pieces of soft felt and craft glue them together.. or try craft foam paper..
Decorative pieces such a wreath picks, feathers, fake fruit piecesm beading, netting
Hair Comb or two (My original hat is taller then those in the tutorial so I needed two hair combs)
Scissors
Something to use as a stencil for the top piece of your hat, and the bas of the hat.
1. Using the stiff felt, I used the bottom of a cup to trace the top flat panel of the hat. Once you are done tracing this piece, Cut it out. 2. Using the stiff felt again, I used the bottom of a hat I already had made to trace the bottom base of the hat. When I first started I used a CD and then sketched it slightly bigger then the cd.. you can also use an upside down bowl. Once you are done tracing.. cut out the circle.. 3. Using a tape measure, measure the circumference of the top of the hat. This is the length of the side panel you will need to make. I also wrapped a piece of felt around the hat to double check the length. 4. Once you have the length, sketch an arch on your soft felt in the same length as the circumference. The steeper the arch, the more of an angle you will form with your top hat. The straighter the line, the more of a perpendicular hat you will have (Similar to a traditional top hat.. I wanted an arch to give it that odd affect of the top of the hat getting bigger).5. Decide how tall you would like your hat and sketch a similar arch at that distance below your first arch. Once you are done, cut this piece out.
6. We are now going to cover each piece with your selected fabric. With the top portion of your hat, measure out a piece of fabric just slightly larger than the top of the hat. Using glue, (whichever you chose to use) Glue the hat top onto the piece of fabric.7. Using a pair of scissors, you will need to cut slits in the pieces of fabric that are hanging over the hat top… This will allow you to glue the pieces down evenly.
8. Using your glue, glue the pieces of cut fabric to the under side of your hat top until they are all attached.9. You will need to repeat this step with the piece of soft felt that will make the side wall of the hat.10. Cut a piece of fabric just slightly larger than the side hat piece of soft felt. You need to glue this piece down as well, and then cut the side edges in order to fold them over.
11. Glue down the cut pieces onto the opposite side of the soft felt12. The base of the hat is the hardest piece since both sides of the base will be seen. You will need to cut a piece of fabric large enough to cover the hat completely by placing the stiff felt in the center and pulling up all of the sides to the center. You will need to glue this piece down in the center.13. I use a little glue to hold down the main pieces of fabric down to the opposite side of the hat. I put the gleu in a cross pattern and pull up one of each of the four sides14. Using a needle and thread.. Pull the corners up to the center of the hat and sew down in a pattern or style you like.. I try to fold mine to make it nice and neat.. remember that the center where everything comes together will be covered by the top of the hat so it is ok if it looks a little rough. 15. Using straight pins, fast the top flat piece of the hat to the side wall of the hat.16. Then, use a needle and thread to attach them together.17. Once you have completed attaching the top to the side wall, stitch down the side of the side wall bringint to the two ends of the sidewall together.18. Fill the top of the hat with any extra fabric you may have. This will help to keep the hat standing straight.19. Using straight pins, fasten the top of the hat to the base where you would like to have it..
20. Using a needles and thread, attach the top of the hat to the base of the hat.
21. Once this is complete, you can decide where you would like to add your decorative pieces. I usually use a needle and thread as well as hot glue(hot glue really helped me a lot when it came to the different picks.. Also, I found that if you are using picks that have a wire inside them, you can usually bend them slightly and slide the bottom of the wire under that hat to hide the excess.22. Once you have completed attaching your pieces, you can sew a hair comb or two to the bottom of your hat.
Enjoy ladies! If you have any questions please feel free to let me know!
Saturday, October 25, 2008
Bridal Shower Teaser Pics
OK, so this is just a real quick thing.. My bridal Shower teasers were posted by Devynn on her blog
They look amazing! I love her work!
Also, I will have the DIY Derringer tutorial tomorrow!
They look amazing! I love her work!
Also, I will have the DIY Derringer tutorial tomorrow!
Sunday, October 19, 2008
2 More Derringer Hats!
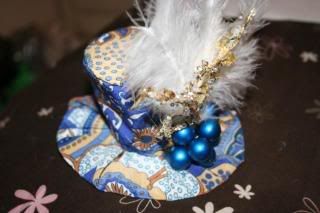
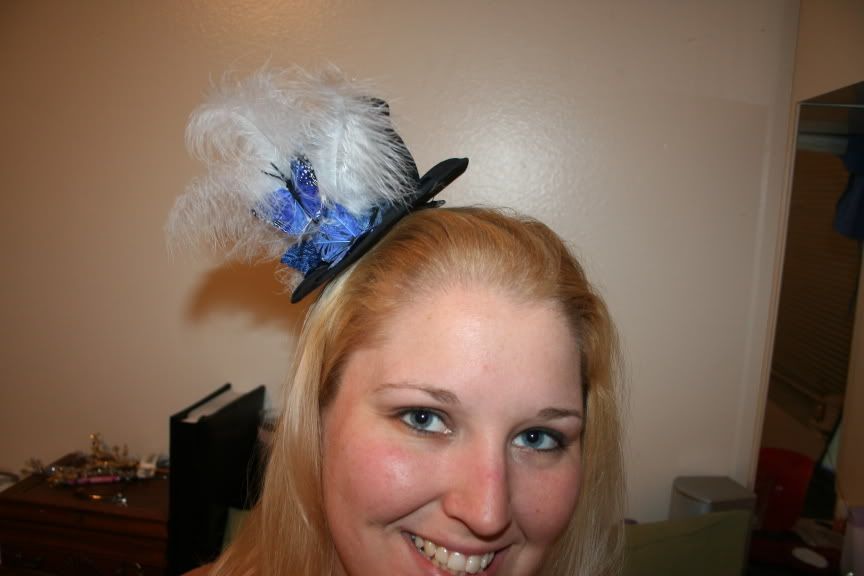
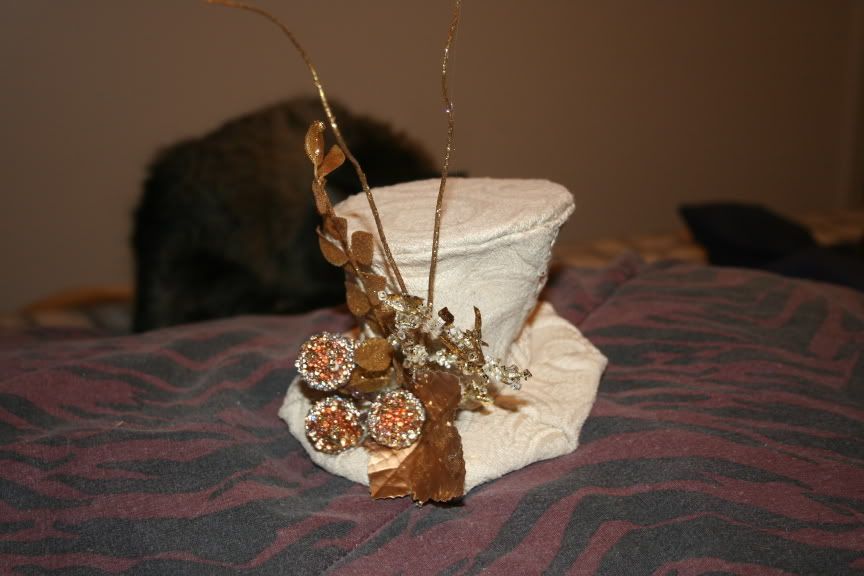
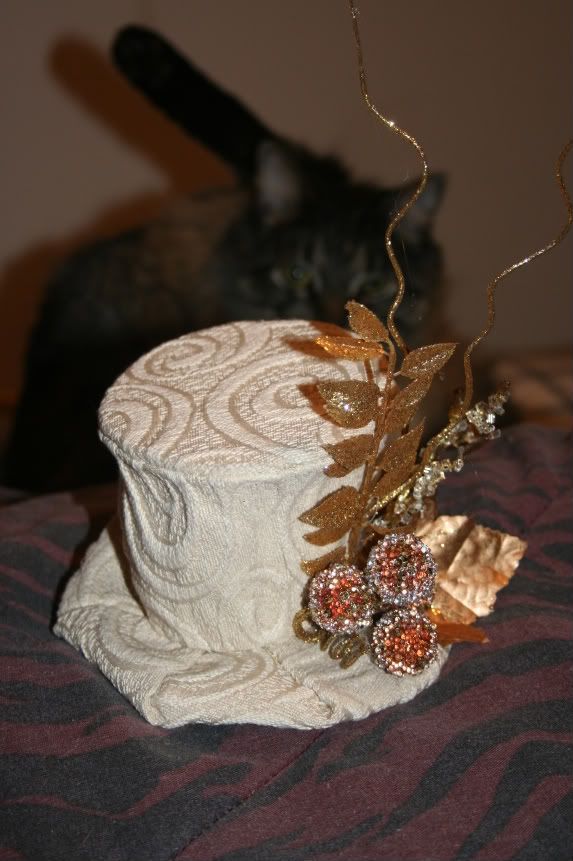
OK so my sisters and my friends Denise saw my hat and requested their own.. I have one more to do it will be a red and gold hat.. but here is my sister's hat.. she is wearing a white dress with blue and black flowers: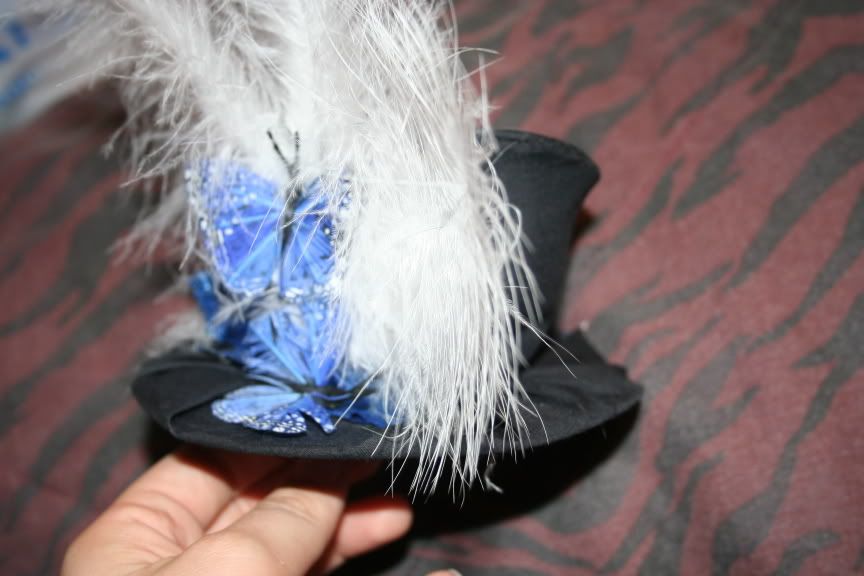
And this one was made for my friend Denise.. this is actually the fabric she used to re-do her chairs and valances..
I Also had the gold picks left over from a Christmas Wreath I was going to make..
And this one was made for my friend Denise.. this is actually the fabric she used to re-do her chairs and valances..
I Also had the gold picks left over from a Christmas Wreath I was going to make..
Wednesday, October 15, 2008
DIY Deringer Hat for Bridal Shower!
Hey ladies! So I have been working on a difficult project for my Bridal Shower. My sister is throwing me a Mad Hatter Tea Party so I thought it would be fun to have a vintage style hat! After doing some research and finding some super cute Deringer hats and their price tage, I figured I could make these.. I can make anything! I Love my end results and now I am making one for my sister and my friend! I need to get cracking on them.. but here are some terrible pics of my process along the way and my final result..


MIA!!
OK, So I knwo I have been MIA lately... Work has been crazy with the new job, plus I am having SEVERE Drama going on lol... but I promise I will be posting my DIY Deringer hat..
BTW... We are going to HI on our HONEYMOON!! YAY!! I also have become a registry stalker! IT's terrible, I know!
BTW... We are going to HI on our HONEYMOON!! YAY!! I also have become a registry stalker! IT's terrible, I know!
Monday, September 29, 2008
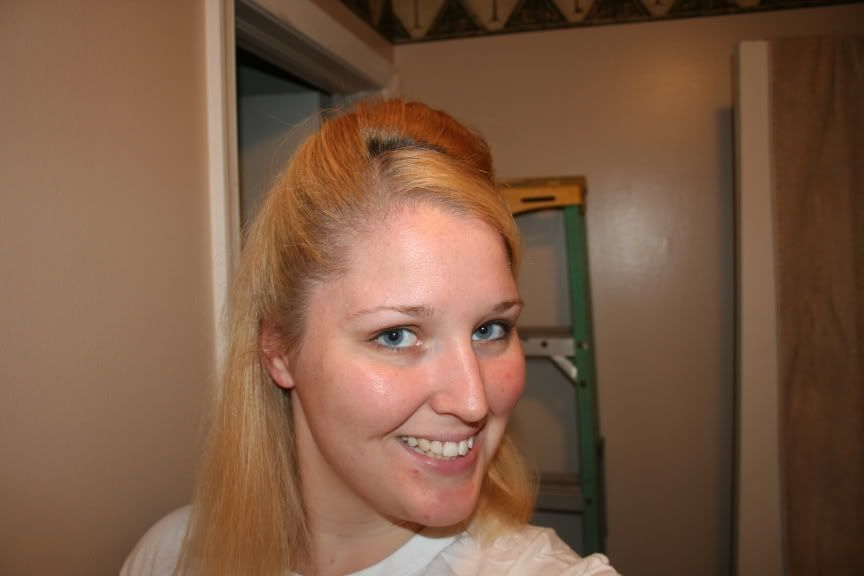
Great DIY Hair Tutorials
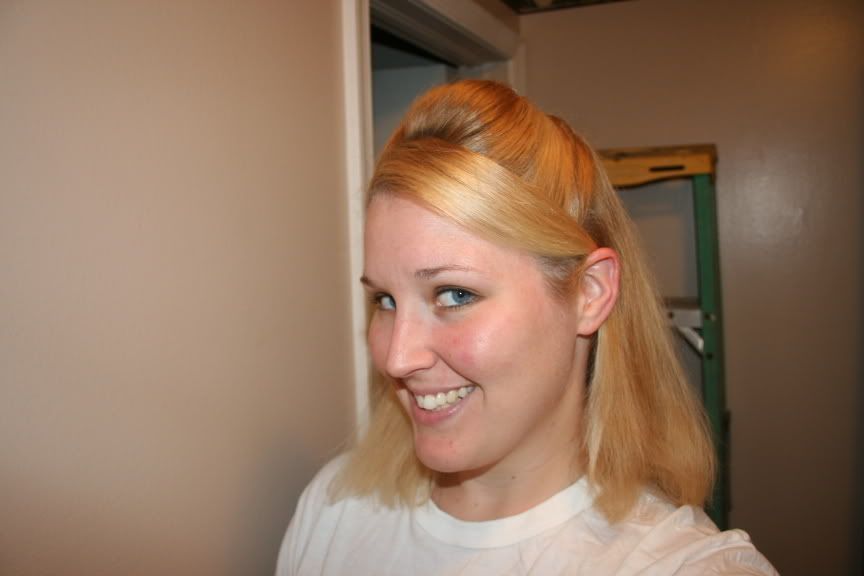
So.. Thanks to Mrs Vingtage Glam as well as It's a Jamie Thing I ventured onto this Youtube Video:
I think this would make for a fabulous wedding day hairstyle..
Have you found any other videos that you enoy that would be a great tutorial? I would lvoe to try them!
Here are my results!
Please excuse the lack of make up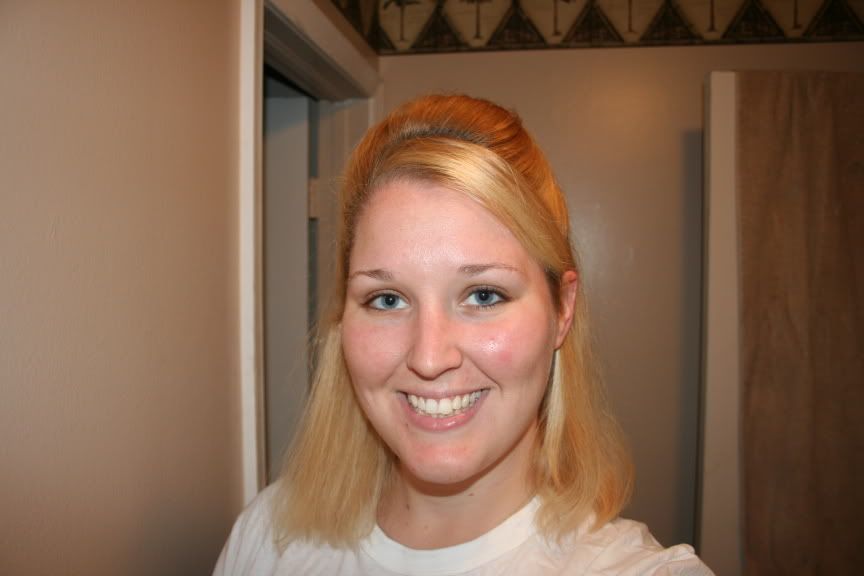
I think this would make for a fabulous wedding day hairstyle..
Have you found any other videos that you enoy that would be a great tutorial? I would lvoe to try them!
Here are my results!
Please excuse the lack of make up
Friday, September 26, 2008
I've been Tagged! I Feel the LOVE!
So not only do I have new followers, but I have been tagged!
This is my first time, and I have to say I feel special that others are even reading my blog let alone tagging me! So I will do my best!
Thank you Tayia at Love, Life, and Maple Leafs .. This is actually a new blog that I have found and if you are planning on DIY for your bouquets.. definitely check out her bouquet wraps!
Alright, so here we go!
4 things I did today:
1. I picked up all of my supplies for our "wedding intervention" tomorrow.. This is a Get together a group of friends is throwing for me to get a handle on quite a few of my DIY projects including invites, pomanders, favors, tissue pouches and many many more things..
2. I conversed with Etsy Seller Debrashi in regards to my flower hair pics for my wedding.. She makes clay flower arrangements, bouts, hair picks, and many other projects.. I am hoping to have her make me an orchid cluster, each of my girls a single orchid hair clip, and my flower girl an orchid hairband.. Knottie Rebmav raved about the Gardenia she had Debrashi make for her. I've also been told that they are surprisingly light!
3. Today was the last day in my current job, so today my co-workers and I celebrated my promotion with a fabulous breakfast they brought in for me, as well as packed up my desk :(
4. I applied to be a WeddingBee! That's right!
4 things on my To Do list:
I only get to list four?!?! Oh lord!
1. I need to write my paper on what leadership means to me for my Leadership Development course
2. I need to re-make, print, and cut my Direction inserts for my wedding invitations
3. I need to clean my house! I Swear that my fiance is going to divorce me before we ever get to our wedding day! (I am the self-proclaimed "World's Worst Housekeeper")
4. I need to mail out my Gift Swap Gift to one of my fellow January 09 Boards.. I was supposed to send this to her over a month ago and it has just escaped me.. I can't apologize enough to her!
4 of my guiltiest pleasures:
1. NACHOS! lol, does food count?
2. The Knot .. I am officially addicted to it and my fellow knotties.. I can't get enough wedding questions, suggestions ,and ideas!
3. Tayia, I am with you.. I am a closet Brittney Fan!!! I cant get enough of her..
4. Photography, I LOVE to take my camera with me everywhere.. I don't care if I have to take 500 pictures.. if I walk awy with one amazing shot.. I am smitten.. and let me fine tune this even more.. I LOVE photographing my neice Samantha.. She is such a little ham!!
(insert cute photos here hehehe)


4 random facts about little ol' me:
1. I was an exchange student my Junior year of High School in Austria.. One of the best experiences in my life...
2. I am an avid outdoors women.. I love to camp, go four-wheeling, mudding, and yes.. hunt..
3. I drive a HUGE pick up truck.. It even has steps to get up into it.. LOL.. I LOVE it..
4. I originally was a vocal music major in college.. I studied Jazz at the University of North Florida...
Now I'm gonna tag 4 people:
1. It's a Jaime Thing!
2. Polka Dot Bride/Groom
3. Tasty Treats by Michi
4. Vintage Glam Blog One of my All time Favorite Weddings!
Thanks for the link, Interesting turn of events..
So I see that I have a few followers.. Thank you ladies and gentleman for the following.. I know I am fairly new to this whole blogging world, but it is definitely something I am beginning to enjoy. I also wanted to say a special thank you to It's a Jaime Thing!.. I see I am now listed under her Wedding Inspiration links! I feel very honored and I hope that I can live up to it!
On another note,
Things have been rolling along smoothly for me. Today was my very last day in my current job. I have held my position for almost 3 years now in the Legal Compliance department where I have filed, and pushed, and prodded with attorneys, state agencies, clients, and co-workers. I have to say that it has been an interesting three years and I have seen myself grow as an individual as well as a professional. I will miss my co-workers dearly, but luckily I will still be working for the same company.
On Monday, I will begin my new position as a Client Relations Manager. What that has in store for me, I'm not quite sure. I am positive however that the changes will offer me an enormous opportunity for growth.
Between a new job, the wedding itself, staying healthy, and school I know that I will have a lot on my plate.. but I know with everyone's patience and support that we will make it to the finish line! i look forward to sharing with everyone as we get closer and closer. Do any of you balance a large plate as well while planning? I'm interested to know if I am the only one out there.
BTW.. 99 DAYS UNTIL MY WEDDING!!!
Tuesday, September 23, 2008
DIY Napkins...
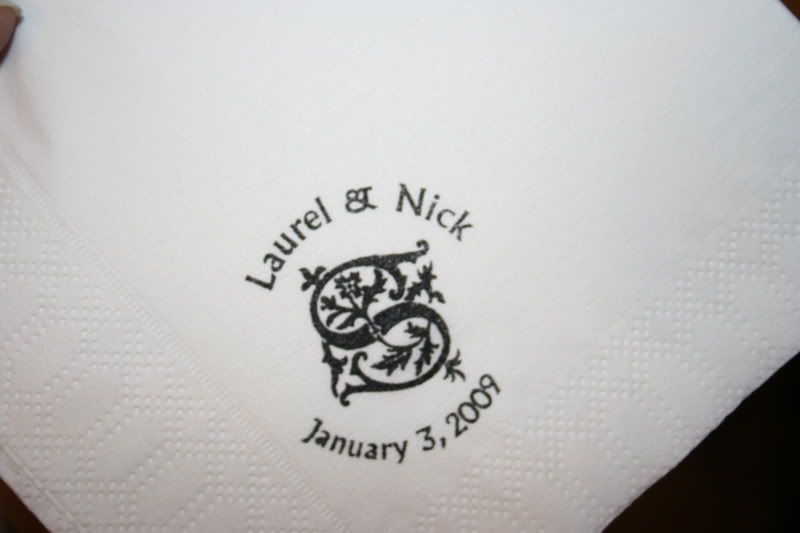
So.. I just realized that I never posted my DIY Napkin Expiriment..
Yes ladies and gentlemen, you can even DIY Napkins. Matchbooks.. the possibilities are endless!
What you will need:
A Stamp of your choosing... I had a custom monogram stamp made on Ebay by seller Longchai for about $10 and I LOVE it...
StayZOn PErmanent Ink in your choice of colors..
Napkins or Matchbooks
I just recommend getting a good coat of ink on yoru stamp and then pealing it off of the napkin slowly so that it does not tare.... Here are the pics and the pic of the water test... no smudging yay!!
Sunday, September 21, 2008
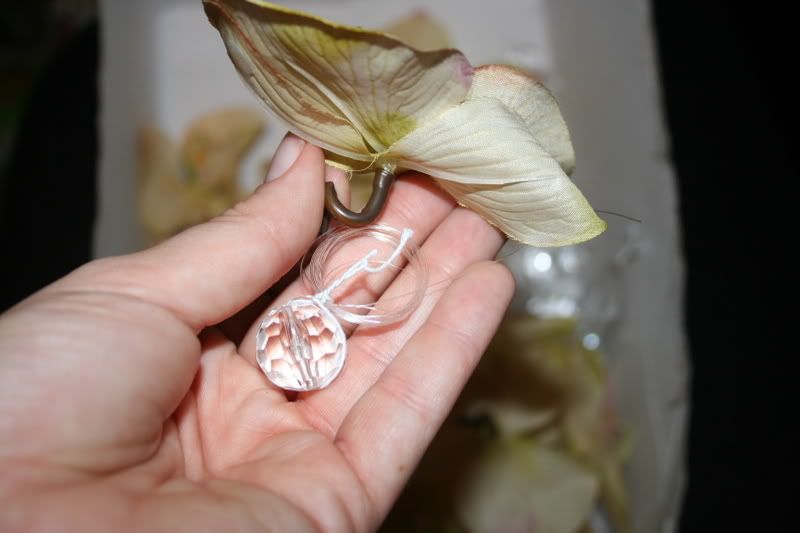
DIY Floating Orchids
Ok.. So today has been a lazy Sunday for me.. but I did accomplish something! I finished my floating Orchids and crystals...
For this project you will need Orchids(or a flower of your choice)
Crystals, and fishing line... (clear)
I recommend stringing the flowers through a petal rather than the back of the flower.. this will help so the flower faces outward...
I also tied a knot below the flower and each crystal to make sure they stayed in the correct place..

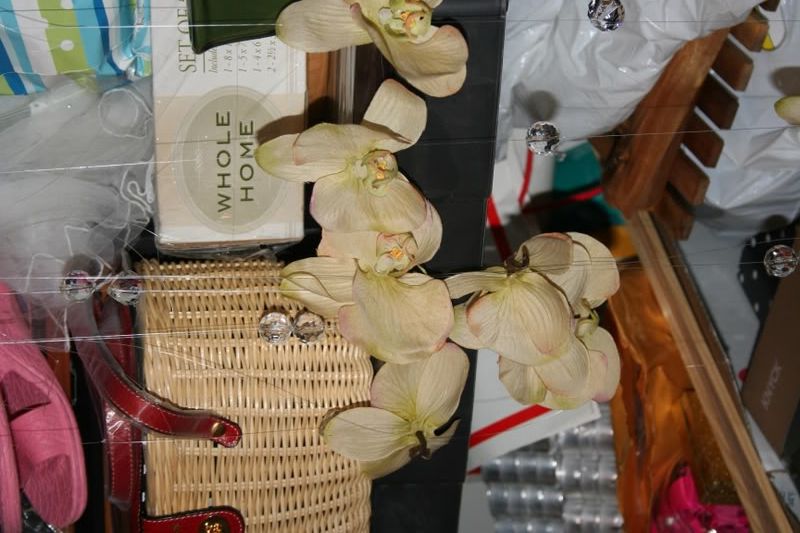
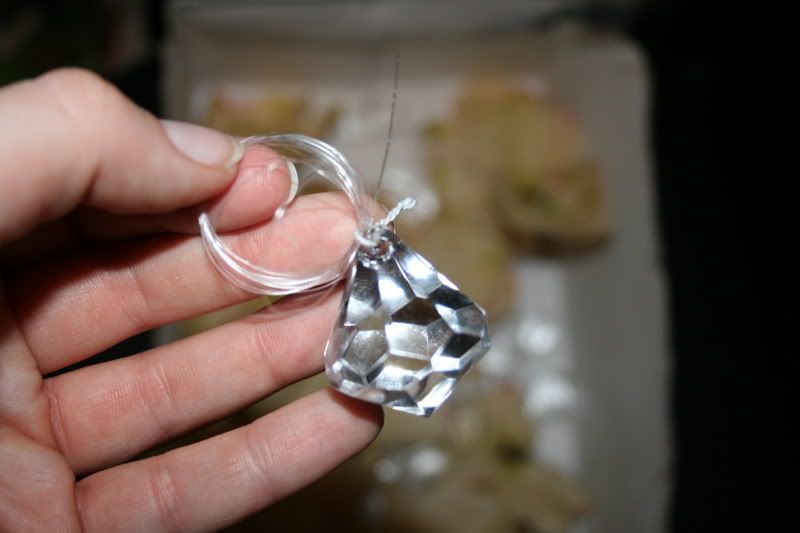
 I also recommend rolling up all of the strings and tying them with a twist tie before storing them away in a safe location.. I ended up having to cut four strands to pieces because they got very knotted together
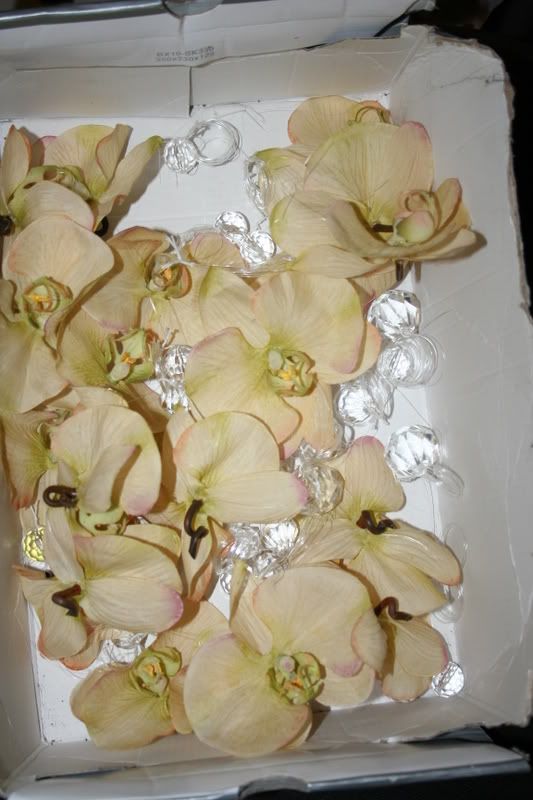
So on another note.. I have quite a few things to accomplish this week before our wedding intervention on Saturday.. I have to print and cut all of my direction cards over... damn map.. lol... I also need to purchase more styro balls and tissue paper for the pomanders... Jen has also graciously offered to score all of my invite backings... Things are coming along smoothly YAY!
Saturday, September 20, 2008
Pasta Salad
So Tonight I made one of Fi and I's favorite dishes 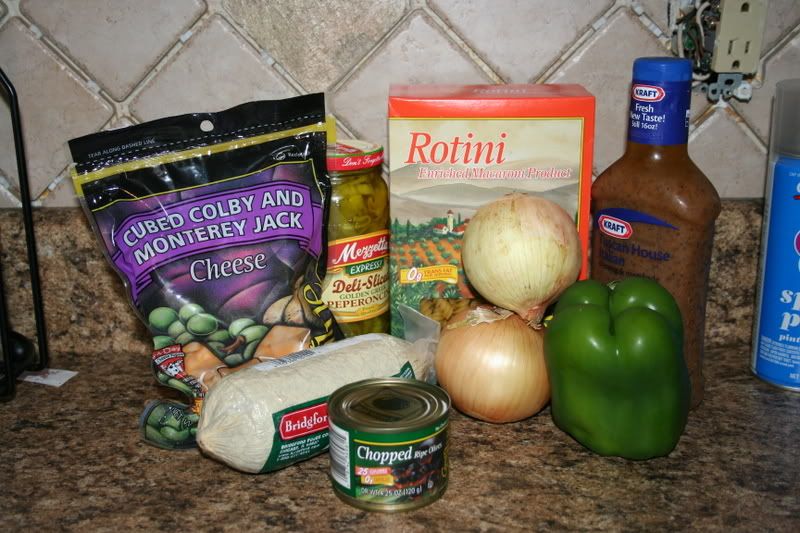 .. Antipasta Pasta Salad.. So I thought I would share.. You can be as creative as you like with this dish You can add as many veggies as you like and you can get as healthy as your mind can imagine.. I start with the basic items..
1lb of Rotini
1 lb of cubed cheese (I prefer Pepper Jack or Monterey Jack)
2 Medium Onions
1 Pepper (Or more to taste)
1 lb of Hard Salami
1 Can of sliced Olives
I jar of Pepperoncinis Sliced
1 Bottle of your favorite Italian Dressing(You can also use a vinagrette or Balsamic Vineger and Olive Oil)
Sometimes I add Celery, Cherry Tomatos, Cucumbers.. etc..
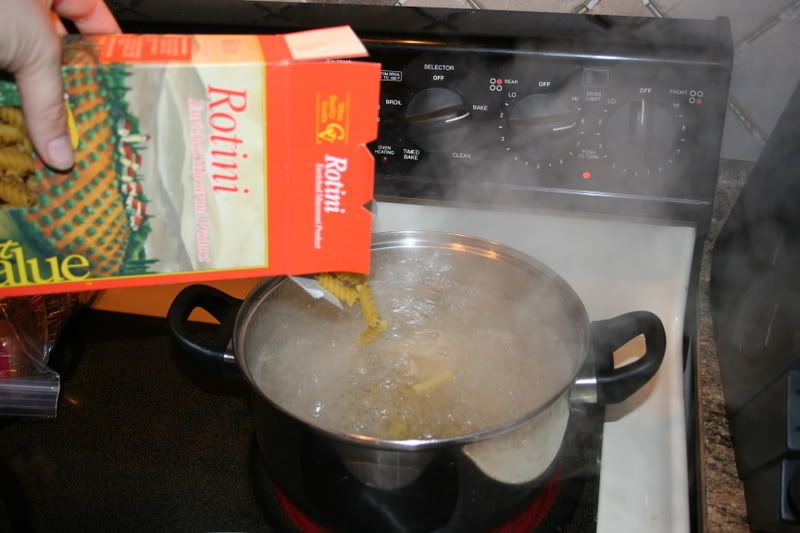
 Step 1:
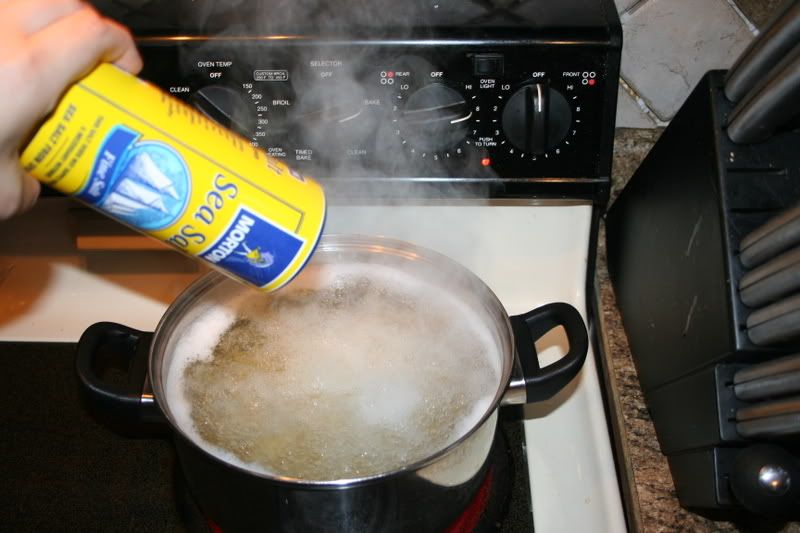
You can start by boiling the Pasta to taste according to the directions on the box... Make sure to season the water with Salt
 Step 2:
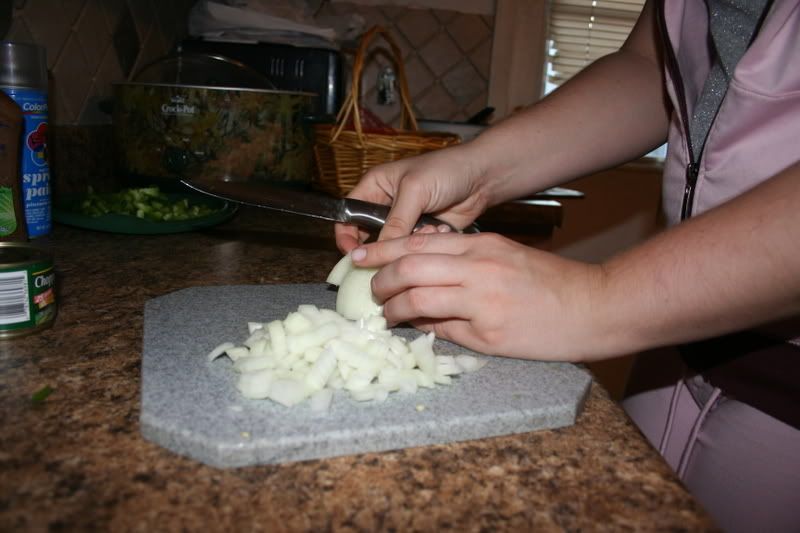
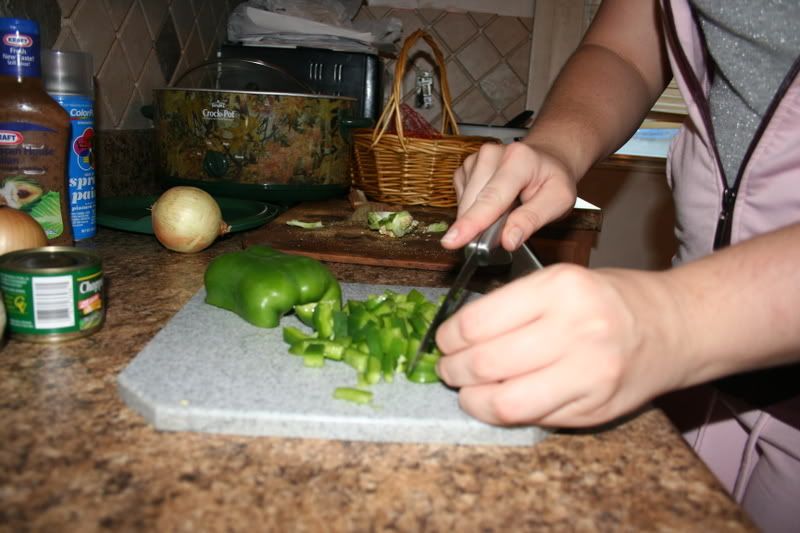
While the Pasta is boiling, Chop all of your vegetables .. I like to leave them chunky so that the pasta salad is a little heartier
 Step 3:
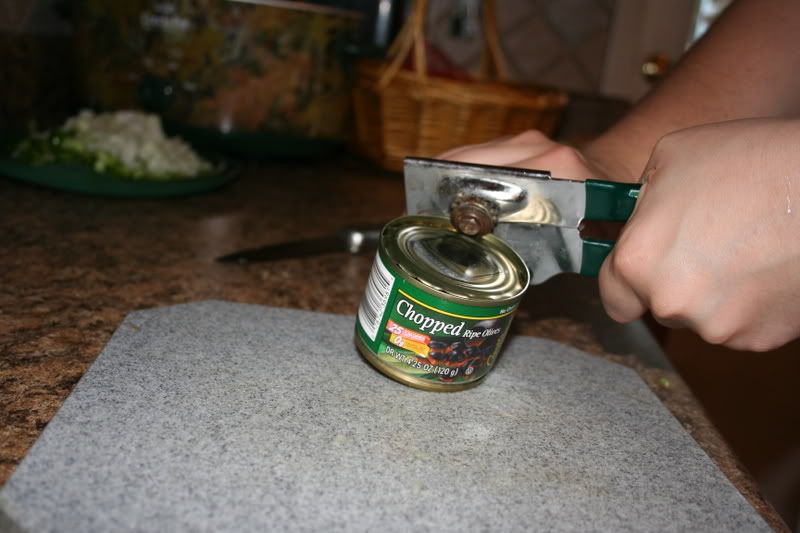
Drain your sliced Olives
Step 4:
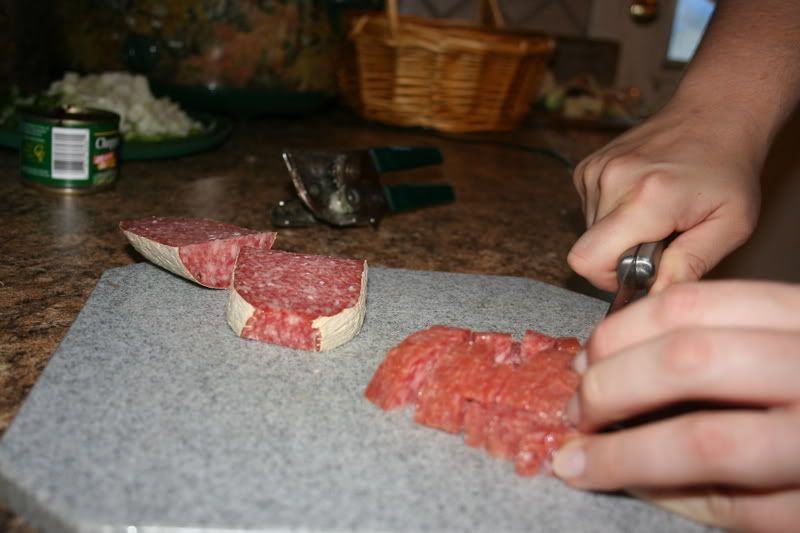
Chop your Salami into Chunks
 Step 5:
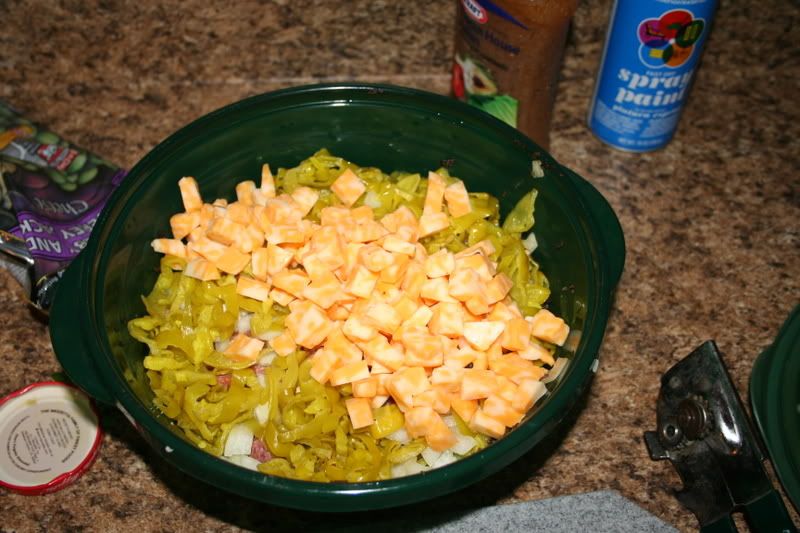
Place all of your ingredients (except Pasta) into a large bowl
Step 7:
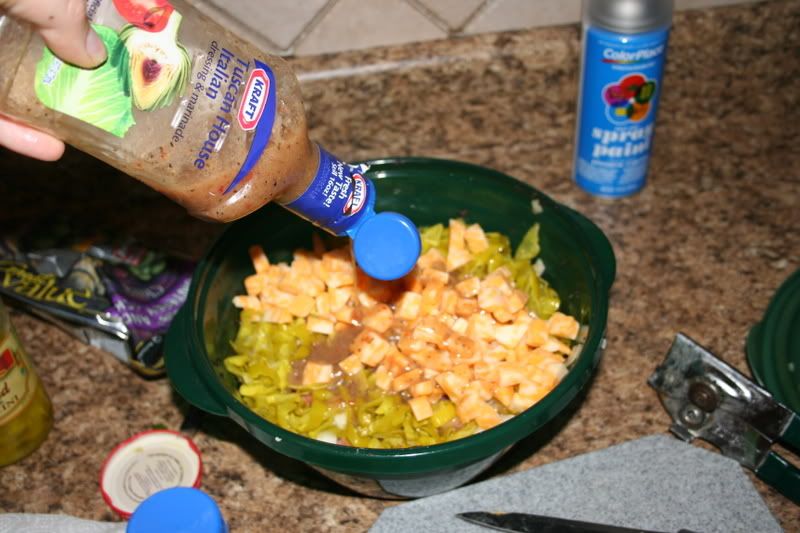
Pour in 3/4 of the bottle of dressing
 Step 8:
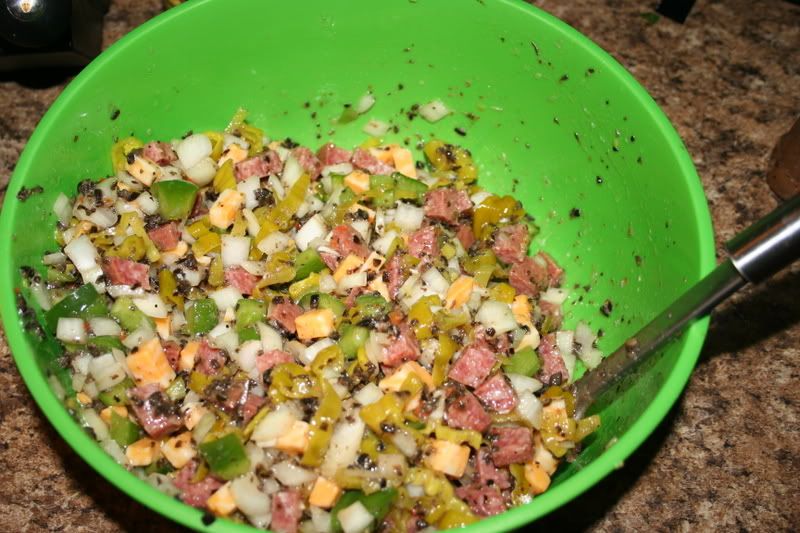
Blend Everything Together evenly (Ignore my black specks.. I mistakenly bought chopped olives instead of sliced hehe)
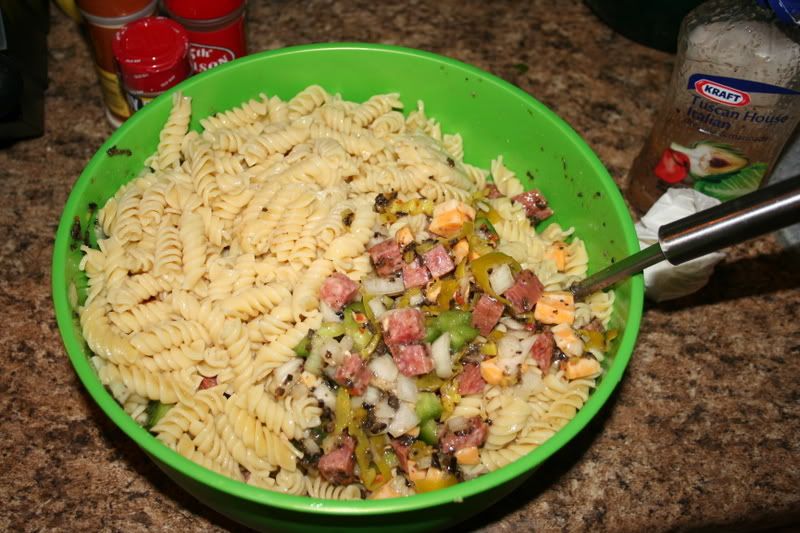 Step 9:
Once you have drained your pasta and it has cooled to room temperature.. add it to your antipasta and blend evenly
Enjoy!
.. Antipasta Pasta Salad.. So I thought I would share.. You can be as creative as you like with this dish You can add as many veggies as you like and you can get as healthy as your mind can imagine.. I start with the basic items..1lb of Rotini
1 lb of cubed cheese (I prefer Pepper Jack or Monterey Jack)
2 Medium Onions
1 Pepper (Or more to taste)
1 lb of Hard Salami
1 Can of sliced Olives
I jar of Pepperoncinis Sliced
1 Bottle of your favorite Italian Dressing(You can also use a vinagrette or Balsamic Vineger and Olive Oil)
Sometimes I add Celery, Cherry Tomatos, Cucumbers.. etc..
Step 1:You can start by boiling the Pasta to taste according to the directions on the box... Make sure to season the water with Salt
Step 2:While the Pasta is boiling, Chop all of your vegetables .. I like to leave them chunky so that the pasta salad is a little heartier
Step 3:Drain your sliced Olives
Step 4:
Chop your Salami into Chunks
Step 5:Place all of your ingredients (except Pasta) into a large bowl
Step 7:
Pour in 3/4 of the bottle of dressing
Step 8:Blend Everything Together evenly (Ignore my black specks.. I mistakenly bought chopped olives instead of sliced hehe)
Step 9:Once you have drained your pasta and it has cooled to room temperature.. add it to your antipasta and blend evenly
Enjoy!
Subscribe to:
Posts (Atom)


